Foil is a great way to make prints shimmer without using another screen for metallic ink. It brings out details in designs with reflective qualities and can look spectacular if done right. Generally, a unique foil adhesive is used for decorating shirts with foil. But stretch plastisol ink can work in a pinch. Print experimenter Ronald Peters tests it out.
WHAT IS STRETCH INK
Stretch ink is a specialty ink that makes prints more pliable. It can be printed as a base or mixed into other inks to create the extra stretch. Stretch ink is meant for printing on garments that will be stretched significantly, like wrestling singlets or spandex. When cured properly, the ink will resist cracking or splitting when stretched beyond an ink's normal limits.
So how can it be used as a foil adhesive? Foil adhesive acts as a glue to adhere the foil to the garment through heat pressing. Stretch ink has a few of these sticky qualities that can work to decorate garments with foil. While all plastisol inks have some inherent stickiness (that’s an industry term), Stretch ink carries more than regular inks.
Note: Using Stretch ink as a foil adhesive will not be perfect. Since it is not an intended adhesive, the final product may have imperfections.
RELATED: DON’T WORRY, BE STRETCHY: INTRODUCING FN-INK™ STRETCH PLASTISOL INK
HOW TO USE STRETCH AS A FOIL ADHESIVE
Using Stretch ink as a foil adhesive follows a similar process as with an intended foil adhesive: print, cure, heat press. However, because Stretch is ink and not an adhesive, there are a couple of factors to consider.
First off: the color of the foil. When using a foil adhesive, all you’ll need to do is print the adhesive, cure it, and heat press the foil onto the garment. Since Stretch ink isn’t an intended adhesive, though, there may be some imperfections once you peel the foil off the garment.
To limit this, print a color of ink underneath the Stretch layer that’s similar to the color of foil you’ll be using in the design. For example, print a silver or gray ink color underneath a silver foil.This will limit the imperfections that you’ll see once the foil is peeled off. Instead of seeing the shirt color underneath, you’ll simply see the gray ink color.
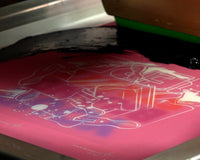
Flash the colored ink layer and print the Stretch ink layer. Aim to lay down a thicker ink deposit to create a sticky layer for the foil to adhere to. Once both ink layers are printed, send them through the dryer to cure.
RELATED: HOW TO PRINT FOIL ON A SHIRT WITH FOIL TRANSFERS

HEAT PRESSING
Once the ink on the shirt is fully cured, it’s time to heat press the foil. Lay the shirt on the heat press and lay the foil on the design area with the colored side up. In the video, the heat press is set to 360°F.
Heat press the shirt for 15 seconds with medium pressure. Make sure the print is completely cool before you peel the foil off. Peeling the foil when it’s hot can cause some foil to peel off the design itself.
Gently brush the design with a shirt to make sure the foil is adhering to the stretch ink. It also carries away a lot of the heat, so the foil cools down quicker.
Peel foil like you’d peel a Band-Aid. Get a good grip on the foil and rip it off.
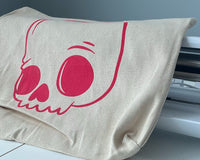
In the video, Ronald tests out 3 different foil colors: silver, green, and orange. The silver foil was the most difficult to peel off. He tinted the stretch ink with a bit of gray to mask any blemishes with the foil peel.
RELATED: WHY EVERY SCREEN PRINTER NEEDS A HEAT PRESS IN THEIR SHOP

Using Stretch ink as a foil adhesive isn’t perfect, but it will work in a pinch. Keep experimenting and improving your foil technique. Not every print will be perfect. Following these guidelines will help you make the most of printing with foil using Stretch ink.


