
When you buy a bucket of plastisol ink, it might have been sitting on a shelf for a bit before it got to your shop. You might notice that your ink has separated a little bit. Even ready-to-use inks can separate over time. Let’s talk about why this happens and what you can do to prep your ink before you head to the press.
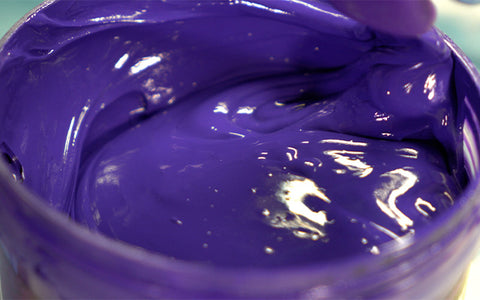
When an ink has been sitting for a while, the ink develops what is called a “false body.” It’s a technical way of saying that it stiffens up. The best way to prep this ink for printing is by stirring—or modulating—the ink. This will break up this false body and make your ink creamy and ready to print.
INK CHEMISTRY
Think of plastisol ink like natural peanut butter. When it's been sitting for a while, it's stiffer than usual and may have a little bit of oil on top. When mixed well, it develops a nice, creamy texture. Inks work in a similar way.
Over time, some chemistry in the ink will settle out a little bit. You’ll notice if it has settled when there’s liquid on top of your ink. Stirring the ink will help mix everything back together, warm it up, and make it ready for production.

Pro Tip: Ink will perform best around 80°F. Warm ink will always print better than cold ink. Stirring your ink will start to warm it up, but the best way to warm your ink is to use the heat coming off the platen while you do your test prints. You'll feel the difference in the ink as you move it around.
LONG VS. SHORT-BODIED INKS
Not all inks are created the same. If you open two buckets of different brands of plastisol ink, you might notice they look different. There are two types of plastisol ink: long-bodied and short-bodied ink. Let’s go over the differences.
Long-bodied inks are more likely to develop false bodies. They also have a greater tendency to drip or run off a spatula or squeegee. Because of this, long-bodied inks take longer to modulate before they’re ready to print.
Short-bodied inks are formulated to be more ready-to-use inks. A short-bodied ink won’t take as long to modulate and also won’t run as much as a long-bodied ink.
RELATED: A QUICK GUIDE TO CHOOSING THE RIGHT WILFLEX WHITE INK FOR YOUR SCREEN PRINTING NEEDS
KEEP AN EYE ON YOUR SHOP’S TEMPERATURE
Because plastisol ink performs best at around 80℉, keeping your shop warm is important. A warmer shop means your ink will be easier to use, and you probably won’t have to stir or modulate your ink as much. We still recommend stirring your plastisol ink before printing, though. It helps loosen the ink and makes it extra creamy.
If you live in a colder climate, try to keep your shop warm. Sometimes, all you need is the heat coming from your flash unit or conveyor dryer (while others may want to invest in a space heater). You’ll need to stir your ink a lot more, especially in the winter months.
RELATED: HOW TO HANDLE WHITE PLASTISOL INKS IN COOLER TEMPERATURES
While it’s recommended to stir all of your inks, thicker, longer-bodied inks need to be stirred longer and warmed up in order to get the best performance during production. Short-bodied inks only need minimal stirring, but you’ll still see an improvement in the ink when you stir it.
MODULATING INK
There are a few ways to prep your ink for production. Depending on the temperature in your shop and the chemistry of your ink, you can either stir it with a spatula or use a special drill bit.
STIRRING WITH A SPATULA
Depending on your ink’s thickness and chemistry, stirring with a spatula will do the trick. If you have a short-bodied ink, this method works great. It takes a little bit of elbow grease, but with a little effort, you can stir short-bodied inks with just a spatula.
If you’re modulating small quantities of ink—pints, quarts, or gallons—stirring with a spatula will work just fine. Once you move to larger buckets of ink, you might want to invest in a drill bit.

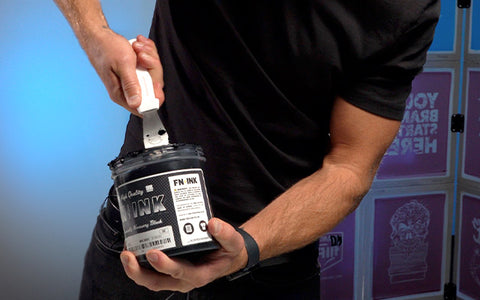
STIRRING WITH A DRILL BIT
A drill bit might seem a little intense at first, but large quantities of ink are difficult to modulate with just a spatula and some elbow grease. You’ll want to use a special drill bit, especially if you’re working with long-bodied inks.
A drill with a mixing blade stirs the ink for you and does it quicker than you would be able to by hand. It will also get the ink warmer than mixing by hand. Pick up a mixing drill bit at your local hardware store and you’re all set. Start slow so the ink doesn't fly everywhere.
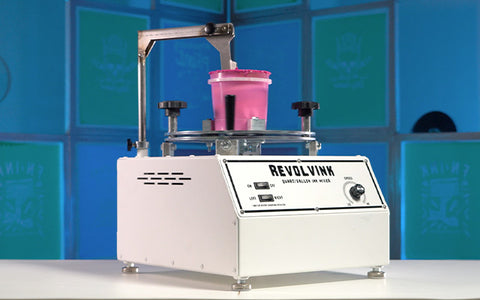
USING AN INK MIXER
To make your life really easy, use an ink mixer to prep plastisol ink. An ink mixer is a device that modulates and mixes ink. It doesn't require any manual stirring or holding a drill. You place the container of ink on the mixer and it'll warm up the ink and make it buttery smooth quickly. If you're modulating white inks on the regular, you may want to take a look at an ink mixer (your arms will thank you).
RELATED: THE REVOLVINK MIXER UNLEASHES THE REVOLUTION IN INK MODULATION & MIXING
Stir up your ink and warm it up before you start printing. If you prep your ink properly, you'll have a much easier time on press.


