
When you look at all the different mesh counts of screens, do you feel overwhelmed? How do you know which mesh count to choose? They range as low as 38 to as high as 400! There’s gotta be a reason for it all, right? There is a reason. Mesh count matters a lot. Each serves a different purpose. Let’s look at the factors that determine which mesh count you’ll need to get the best final look.
First off, what is mesh count exactly? Mesh count is a measure of how many threads of polyester cross each other per square inch of the screen. For example, a 110 mesh screen would have 110 threads crossing per square inch. The higher the mesh count, the finer the holes are in the screen. The lower the mesh count, the larger the holes are in the screen. With that in mind, let’s look at when you need higher or lower mesh counts.
PRINT DETAIL
When you have a higher detail print, you need a higher mesh count (200 and above). If you use a lower mesh count, the lines or dots in the image will fall through the larger holes or the thicker thread diameter will close up dots or fine lines. You’ll end up with a print that is not a correct representation of your image — blurred lines, loss of detail, etc. A lower detailed design is best printed through lower mesh count (below 200) in order to get proper coverage. You can use higher mesh counts, but it’ll take longer to achieve the look you’re going for.
Take this print, for example. Notice the small detail in the snake? In order to get that detail, you’ll want to use a higher mesh screen. This design was also printed on transfer paper, making those mesh counts extra important to control the ink.

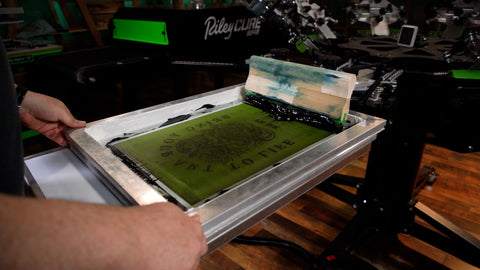
Now, check out this print. It doesn’t have any fine detail, and the words are pretty blocky. A lower mesh count is perfect for this job.

INK TYPE
The thicker the ink you are printing with, the lower the mesh count you will want to use. Thicker ink will be able to be pushed through a lower mesh screen a lot easier than a higher mesh screen. Let’s talk about some differences when printing different types of ink.
WATER-BASED VS. PLASTISOL INK
Water-based ink is thinner ink than plastisol ink. Because of this, it’s best to start with using high mesh counts when learning how to print water-based ink. This way, you’ll lay down enough ink to get a great print, but not so much ink to smash out the design. A good standard mesh count when printing with water-based ink is 180-230. Once you feel comfortable printing water-based ink, you can print on mesh counts as low as 156.
RELATED: HOW TO PREPARE A SCREEN FOR WATER-BASED PRINTING
Plastisol ink is usually thicker than water-based ink. While sometimes you’ll need to print plastisol through a high mesh count (see the section above), plastisol can be printed through lower mesh counts easily. A general standard for plastisol ink is 156 mesh count, which will allow enough ink to move through the mesh to get a good layer of ink on the garment.
Looking for a super soft hand feel? Print plastisol through higher mesh counts for this. Higher mesh counts lay down a thinner ink deposit. Less ink on the shirt creates a softer feel to the print. A screen with a mesh count between 200-305 and a hard squeegee will do the trick.
RELATED: 5 COMMONLY ASKED QUESTIONS ABOUT FN-INK™ PLASTISOL INK

METALLIC, SHIMMER, & GLITTER INKS
Specialty inks like metallic, shimmer, and glitter have flakes: it’s what makes them shine. Metallic inks have the smallest flakes, so printers can use mesh counts up to 230. Shimmer inks have slightly larger particles, so 86-110 mesh counts work best.
Glitter inks have the largest, more obvious flakes to them, while shimmer inks will have smaller particles to give a more subtle look. A mesh size of 36 is ideal for glitter inks, though you can go up to a 64 mesh.
PRINT SURFACE/SUBSTRATE
The item you’re printing on also affects the mesh counts you use. Say you’re printing a job on paper, like cardstock. You’ll want to use a high mesh count to print on any type of paper: posters, business cards, heat transfers, etc. Use mesh counts above 200 for these jobs.
But why? Well, when you print on paper, the ink doesn’t have anywhere to go. When you print on a t-shirt, some of the ink soaks into the shirt, and you can print a heavier deposit without smashing out the design. On paper, especially if you’re using plastisol ink, that ink just sits on top. It doesn’t soak into the paper nearly as much as it would on a shirt, so you can end up muddling the design. By using a higher mesh count, you’ll be able to get a print with crisp lines.
PRINTING OVER AN UNDERBASE VS. DIRECTLY TO FABRIC
While ink and garment play important roles in selecting the right mesh count, whether or not you’re printing directly to the shirt or over an underbase will also determine which mesh counts you should use.
Printing over an underbase is a similar process to printing on paper: it’s not porous, so the ink sits on top of the base (rather than soaking into a t-shirt’s porous fabric). If the mesh count is too low and too much ink is deposited, it’ll run and blur the design. Controlling the ink deposit is key, so higher mesh counts and harder squeegees are required when printing over an underbase.
When printing directly to the fabric, you have more flexibility with mesh counts since the shirt will soak some of the ink. Which mesh count you choose depends on the desired final effects.

WHEN TO USE LOW OR HIGH MESH COUNTS
There’s a lot to consider when choosing the right mesh count for your job. Let’s break it down to a checklist you can use when considering which mesh is right for you.
MESH COUNTS BELOW 156:
- Jobs without a lot of fine detail, like block letters or a simpler design
- Jobs when you’re using thicker inks like white plastisol or shimmer inks with large flakes
IMAGE OF BLOCKY/SIMPLE DESIGN THROUGH LOW MESH
MESH COUNTS 156 & ABOVE:
- Jobs with some detail, like fine lines or standard halftones
- Jobs with water-based ink or printing over a base white
MESH COUNTS 230 & ABOVE:
- SIM Process, high resolution, high detail printing, wet on wet printing
- Jobs printed on paper, like posters, business cards, etc.
RELATED: MESH COUNT AND YOU
THIN THREAD VS. STANDARD THREAD
Thin thread mesh is a great option for printers driven to create the best quality prints with the best detail. Its thinner thread profile and wider dimensional openings allow all ink types to flow through easily.
Using thin thread mesh also improves efficiency on both manual presses and automatic presses. Water-based ink clogs less easily in thin thread compared to standard thread mesh, which means you’ll be able to print longer runs without worrying about not clearing the screen and getting all that sweet, sweet detail.
One thing to note though is that thin thread is more delicate, so it’s not for every shop. If that’s the case, then shops should use standard mesh.
Standard thread mesh, on the other hand, has been a staple of print shops for decades. It’s more resistant to popping and tearing on press than thin thread mesh is.
No matter the thread type you choose for your shop, make sure it works for you. If you’re curious to try a different type of mesh, go for it! Who knows? You might like it.

Using the right mesh count for your prints will help capture the detail you need for your prints. If you’re not sure which mesh you should use, do some testing and research to figure out what works best for your process. Soon enough, you’ll be able to pull the right screen mesh for the job off the rack in your sleep.


