There’s a lot to consider when talking about print placement on a garment. How tall should it be? Where should it be placed? Don’t worry about having all the answers. Here’s a guide to lining up and sizing popular design placements on garments.

BASICS TO CONSIDER
No matter what you’re printing or where there are a few basic placement factors to consider when lining up a job. First, let’s talk about the equipment and supply parameters for a design. You may want to print a giant design, but can your platens, screens, and film handle it?
As a rule of thumb: make artwork that will leave a 1-inch space on all sides of the platen you’re using. While you can get away with leaving only ¼”, you’ll get a more consistent print with more space. Use a squeegee that’s at least ½”-1” wider than your image on each side. That way the image will be able to release from the screen properly as your squeegee passes over it.
RELATED: A CRASH COURSE IN CHOOSING PROPER SCOOP COATER & SQUEEGEE SIZING FOR A JOB
TOOLS TO KEEP ON HAND
Every screen printer needs some handy tools to keep around. First up is a T-square. It’s useful for many things — measuring designs, keeping everything square, and defending your print shop from competitors (just kidding, a T-square isn’t a weapon).
It’s handy to keep multiple types of platens around the shop. Besides the standard platens, keep sleeve or leg platens handy, as well as pocket platens or youth platens if you print a lot of those types of jobs. Even if you don’t, who knows when you’ll get a request for youth shirts?
Another tool to have on hand is a tailor’s measuring tape. This is helpful to measure the design on the shirt and lay out the process in your head. The best part of a tailor’s measuring tape is that it’s flexible, unlike a regular measuring tape.
Got all your tools? It’s time to start setting up the job.
QUICK REFERENCE GUIDE
Here’s a quick reference guide for measuring the sizes of prints:
|
Left Chest |
2.5"-5" wide and tall |
|
Center Chest |
6"-10" wide, 6"-8" tall |
|
Full Front |
12" wide, 10"-14" tall |
|
Oversized Front |
12"-15" wide, 14"-16" tall |
|
Back Collar |
1"-3" wide and tall |
|
Upper Back |
10"-14" wide, 1"-6" tall |
|
Full Back |
10"-14" wide, 6"-15" tall |
|
Sleeve |
1"-4" wide and tall |
Now that you’ve got all the measurements in one place, let’s get a little more specific.

FRONT PRINTS
Front prints come in all shapes and sizes. Here are some popular placements.
Tank Tops: Keep the image approximately 1” from the top hem. Tank tops tend to hang lower on the body, and you don’t want a print to land on the belly of the garment.
T-shirts: The 3” down from the collar rule for centered images fits most of the time. Consider the image itself: is it large? Is there a piece that will end up closer to the neck? Would the design look better if it was placed further down on the shirt?
T-shirts come in all sizes, from XS to 5XL. Consider these sizing changes when they come up. In some cases, you may need to enlarge or shrink the design to make it better fit the garment. Adjusting your platen to accommodate the proper print placement is often easier than adjusting the screen. Keep the screen registered and slide the platen in or out, depending on the size of the shirt.
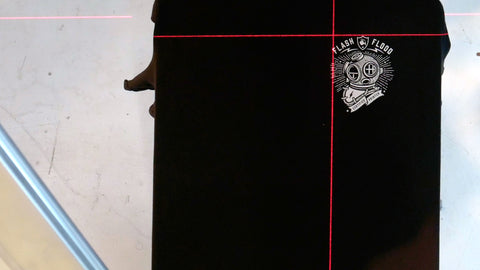
Left Chest Prints: A good rule of thumb is to keep the chest print under 4”. Many printers prefer 3”-3.5”. While left chest prints are generally on the left chest (what a surprise), some customers prefer the right chest over the left. Either way, the center of the design should be about 3.5” from the center of the shirt.
BACK PRINTS
Back prints should sit about 6” down from the hem. When printing large back prints, 12” wide is a good rule of thumb for 13x19” film. The length of the print depends on the size of your platens and garments. If you have long garments and long arms, make designs as long as you like.
Many back prints are oversized prints. These prints are great for back prints because they can cover the whole back. If you’re wanting a print bigger than will fit on a 20”x24” screen, it’s oversized. If a print is pushing the limits of your screens and platens, it’s oversized. In order to print oversized designs with confidence, there are a few supplies you’ll want in your shop arsenal, including larger film, platens, squeegees, screens, and more.
RELATED: THE TOOLS NEEDED FOR OVERSIZED PRINTS

SLEEVE PRINTS
Sleeve prints are another popular print placement, as are leg prints on sweats or leggings. When placing these types of prints, keep them no wider than 3” so they don’t exceed the width of the platen. Some printers like the design to start closer to the top of sleeves or legs, while others like the design centered. Try both and see which looks better to you.
Before you commit to a placement, do a test print on your smallest size garment. You may not be able to load the sleeve in the same place, depending on your platen size and the cut of the garment. In general, load sleeves from the bottom hem unless the cuffs are large. Load legs through the waist to get the most leverage.
OTHER PLACEMENTS
There are tons of popular and creative prints. Here are a few more guidelines for other print placements and sizing:
Koozies: Always measure before printing. 3”x3” is a popular koozie print size.
Totes: Tote prints are usually around 10” in size but vary with the size of the tote. When printing totes double-sided, make sure to cure one size before printing the next.
Neck labels: Neck labels should be no larger than 3”-3.5” wide. Remember, they have to fit in the tag area of a garment. To print these, use a sleeve or pocket platen. You can also print neck labels as plastisol transfers and simply heat press them to the garment.
RELATED: EVERYTHING YOU NEED TO KNOW TO CREATE YOUR OWN CUSTOM NECK LABELS